Chimney Rebuild Ground Up
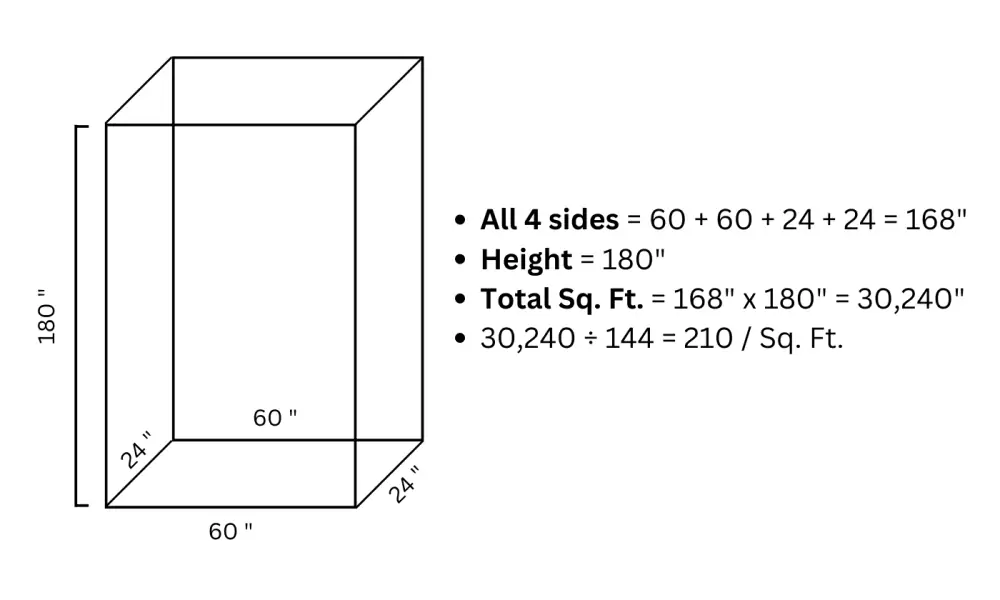
When measuring the chimney, you need to measure all 4 sides in inches and then times by height and divide by 144.
1st Example:

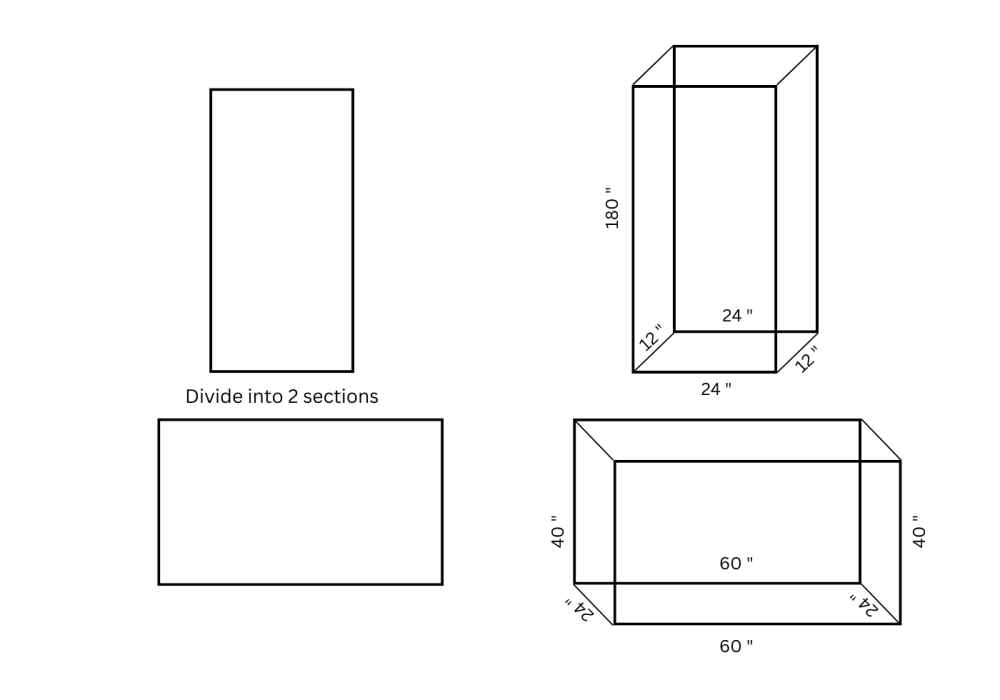
2nd Example: In this scenario you need to divide the chimney into sections to get the correct square footage.

Top Section
Step 1
Measure all 4 sides in inches
Example: 24” + 24” + 12” + 12” = 72”
Step 2
Measure Height in inches
Example: 180”
Step 3
Multiply the two numbers above (Perimeter x Height)
Example: 72” x 180” = 12,960
Step 4
Take 12,960 and divide by 144 will equal your square footage
Example: 12,960 divided by 144 = 90/sq.ft
Bottom Section
Step 1
Measure all 4 sides in inches
Example: 60” + 60” + 24” + 24” = 168”
Step 2
Measure Height in inches
Example: 60”
Step 3
Multiply the two numbers above (Perimeter x Height)
Example: 168” x 60” = 10,080
Step 4
Take 10,080 and divide by 144 will equal your square footage
Example: 10,080 divided by 144 = 70/sq.ft
Total Square Feet of Chimney
Step 1
Take the sq.ft from the top section and add the bottom section square feet together to get your total square feet
Example: 90/sq.ft + 70/sq.ft = 160/sq.ft of chimney
Items needed to build a proper estimate
- Scaffolding
- Demo and remove chimney
- Footing
- Firebox
- Flue Tiles from smoke shelf to top of chimney
- Flashing
- Crown
- Outside Mount Cap
- Water Seal
- Permit
Photos Needed
Front of house showing roof line up to chimney
- Include front yard and driveway
- Include everything that is a potential obstacle for the repairs to be done by a mason
Interior
- Take photo standing back looking at fireplace at least 7’ back
- Take up-close photo of fire box
- Take photo of damper if needed
- Take photo of smoke shelf areas that might show cracks and/or exposed bricks
- Photos of interior flue by using the camera. CAMERA MUST BE USED ON ALL JOBS. If for some reason a camera cannot be used you must note reason why in “customer notes”
- Photo of your setup. Tarps, plastic built rooms ect. How did you protect the customers’ home?
Exterior
- Full length photo of chimney from ground to top. Stand 10’ back if possible
- Include surrounding access area
- If there is a fence or obstacle close to the chimney. Take your tape measure and see how many feet away is the fence. If there are power lines near the work area, make sure that you have photos that clearly show them.
- Take photo on roof looking at chimney
- One shot standing back from 6 feet away
- Close up shots of problems (this may be several shots)
- Note: It would be better to take too many shots than too few
- Photo from top of chimney looking down flu
- If roof lines are difficult, take shots from different angles. Use an app called ‘Pitch Factor”. Screenshot and upload to Service Titan
