Gas Insert Quote
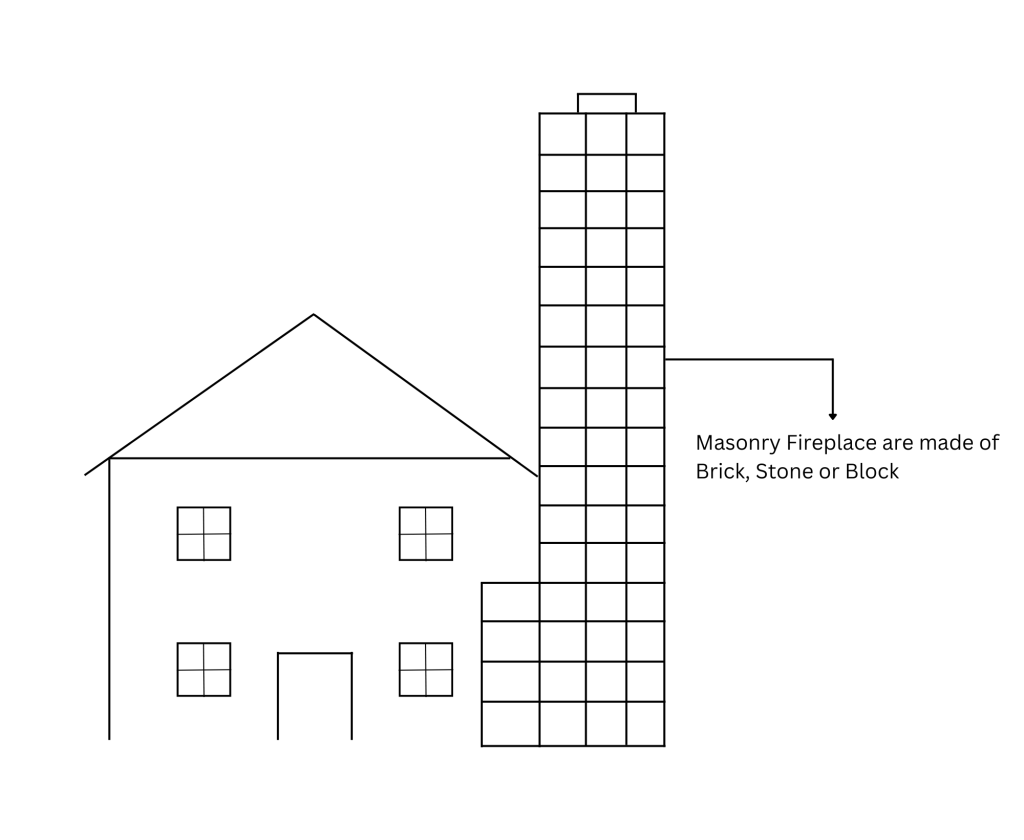
Gas Inserts can only be installed in masonry fireplace
Example:
Selecting the correct unit to fit inside the masonry fireplace
Step 1
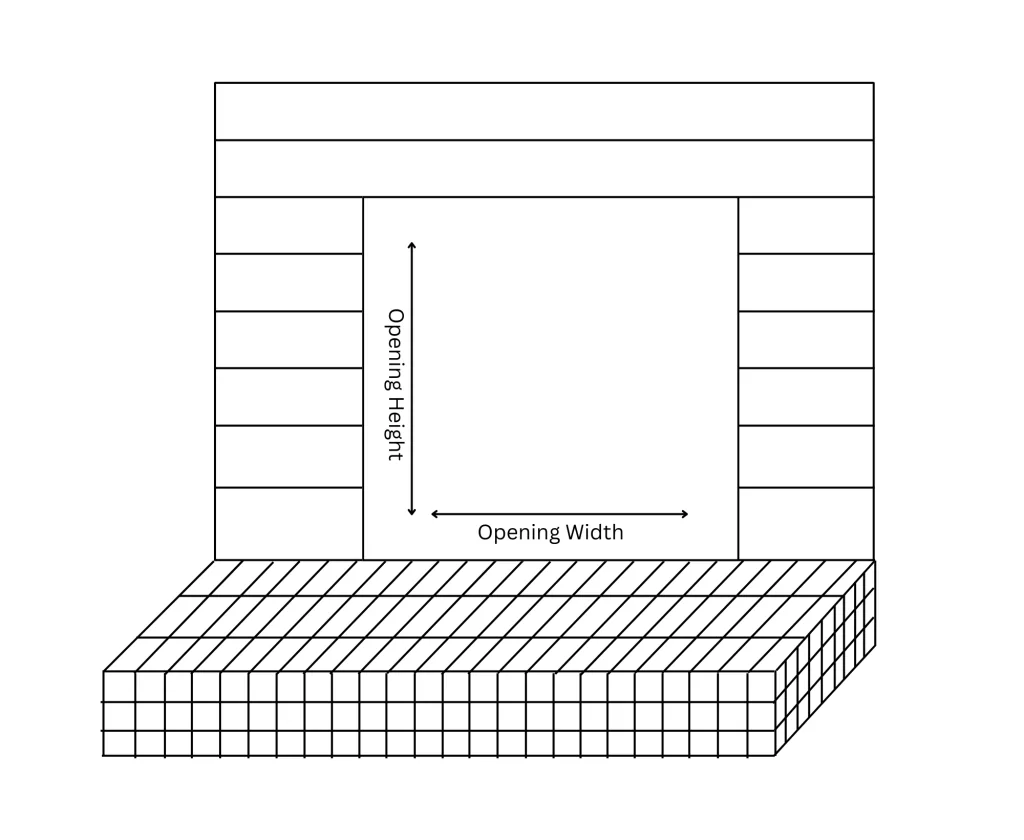
Measure Opening Height and Width of Fireplace Opening where the insert will be installed
Example:
Step 2
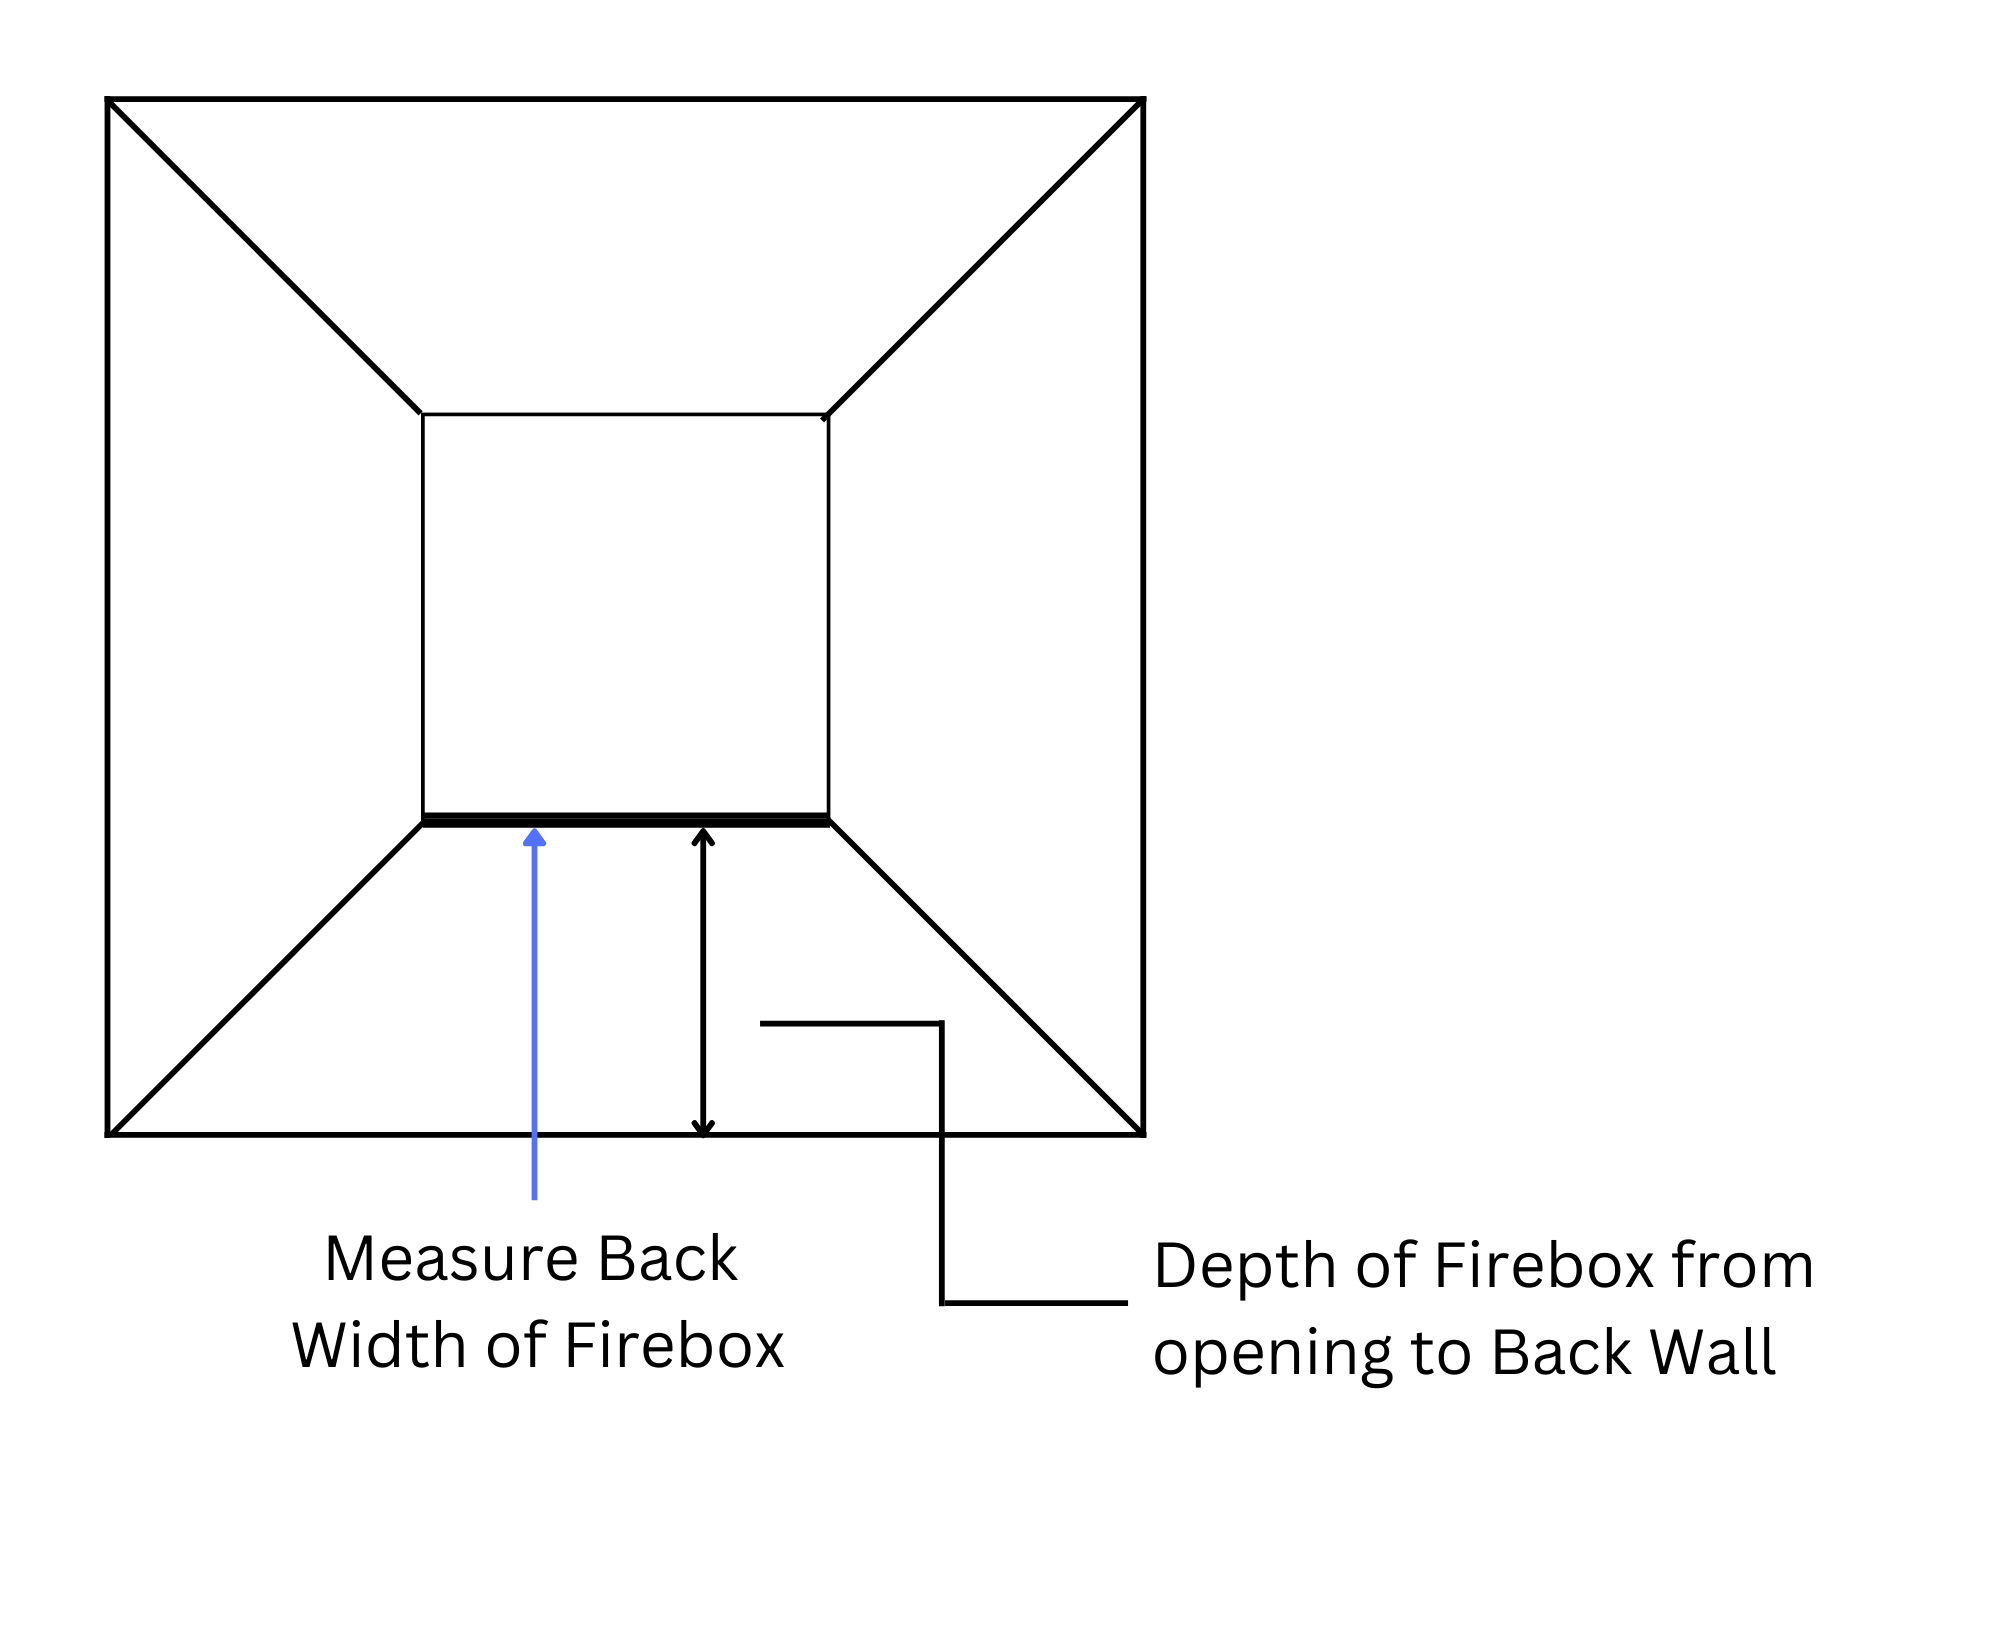
Measure the back width of firebox + Depth
Example:
Step 3
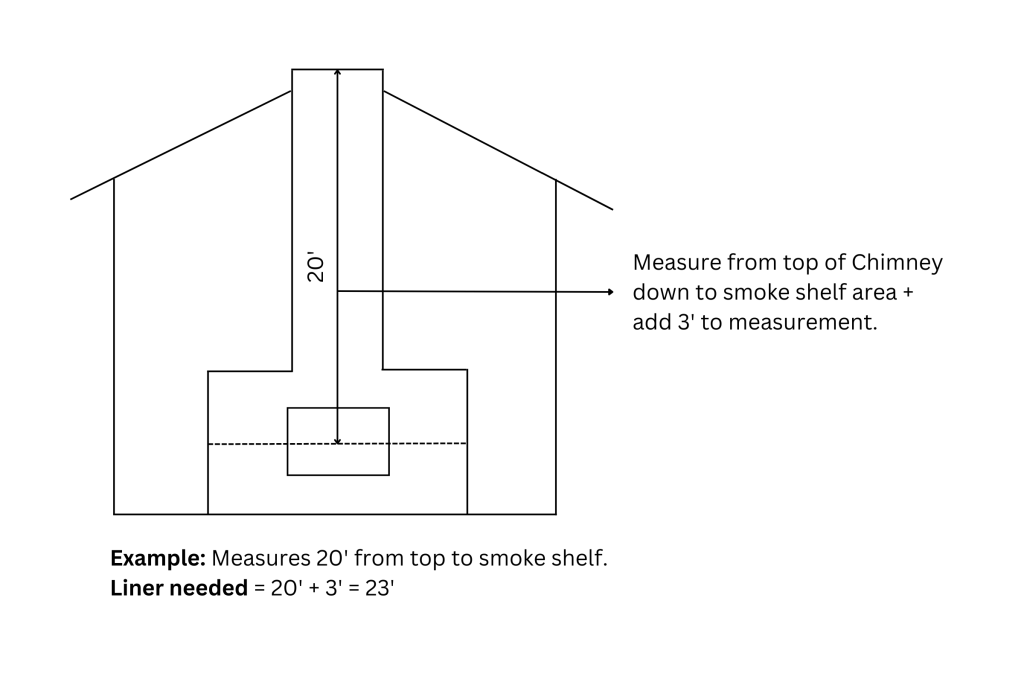
Measure the length of the fireplace from top to smoke shelf and add 3’ as a cushion
Example:
Step 4
Is gas running into the fireplace or do you need to quote for a gas line to be run?
- a. If a gas line needs to be run into the fireplace. How far is the meter from the fireplace? If the meter is on the opposite side of the home you might have to have the homeowner outsource this Consult with your manager if you have questions. NEVER GUESS!
Step 5
Is Electrical run into the fireplace? If not, YOU MUST let customer know that they will need to hire an electrical company to install an electrical box in the rear of firebox. Preferrable in the upper right or left hand corner
Items needed to build a proper estimate
- Scaffolding?
- Appliance Sold
- Required Options Such as
- a. Faceplates
- b. Backing Plate
- c. Brick Panel
- d. Glass Media if not a log set
- Liner Kit
- Installation Fee
- Permit
Photos Needed
Front of house showing roof line up to chimney
- Include front yard and driveway
- Include everything that is a potential obstacle for the install crew
- If scaffolding is needed, take photo of where you would setup scaffolding
Interior
- Take photo standing back looking at fireplace at least 7’ back Take up-close photo of fire box
- Take photo of damper if needed
- Take photo of smoke shelf areas
- Photos of interior flue by using the camera. CAMERA MUST BE USED ON ALL JOBS. If for some reason a camera cannot be used you must note reason why in “customer notes”
- Photo of your setup. Tarps, plastic built rooms ect. How did you protect the customers’ home?
Exterior
- Full length photo of chimney from ground to top. Stand 10’ back if possible
- Include surrounding access area
- If there is a fence or obstacle close to the chimney. Take your tape measure and see how many feet away is the fence. If there are power lines near the work area, make sure that you have photos that clearly show them.
- Take photo on roof looking at chimney
- One shot standing back from 7’ feet away
- Photo from top of chimney looking down flu
- If roof lines are difficult, take shots from different angles. Use an app called ‘Pitch Factor”. Screenshot and upload to Service Titan
Note: It would be better to take too many shots than too few


